This page is related to the old LIME 2.0 for the new one go here.
LIME is an Open Source language independent markup editor which has a very simple installation process that will take you less than five minutes to be completed.
If you wish to install LIME editor yourself you have just to check, on your web server, only few system requirements and fill a very tiny installation form.
If you wish to build LIME from the source code or change it you need to read also the development instructions.
Before installing
Before you begin the install, there are a few things you need to have.
Things to have on your web server
- Access via FTP or SSH
- An HTTP Server
- PHP 5.3.2 or later
- The following PHP extensions:
- curl
- fileinfo
- dom
- json
- libxml
- SimpleXML
- xml
- xmlreader
- xmlwriter
- xsl
- The following PHP extensions:
- The latest release of LIME unzipped on your web server drive.
- An instance of eXist-db and related admin credentials.
- An instance of MongoDB (3.0 or later)
- Node.js (version 0.10 or later)
- Java (needed by Saxon XSLT processor)
- A running installation of Abiword
How to install
Here’s a little list of steps to follow to complete the installation of LIME.
Get LIME
Download and unzip the LIME package if you haven’t already. The package contains the following folders:
- aknservices is a Node.js server which contains AkomaNtoso related services for LIME.
- lime folder constains the client and the PHP server of LIME.
Node.js server
Follow these steps in order to setup the server:
- Extract the “aknservices” folder from the downloaded zip.
- Change the default port in “aknservices/config.json” (default is 9006)
- Modify “aknservices/documentsdb/config.json”
- Set the MongoDb url/port in “mongodb.url“
- Set the filesystem path for storing xml files in “filesystem.documents“
- Set the exist host (“exist.host“), port (“exist.port”) and credentials (“exist.auth“)
- Run “npm install“
- Run the server “node server.js” or consider using the script in “aknservices/start.sh“, which sure only one instance of the server is running, logs errors in log.txt, and redirect output.
For more detailed instructions go here.
Web server
- Move the “lime” folder from the package on the HTTP server working directory (e.g. /var/www)
- If you desire to integrate LIME into the root of your domain (e.g. http://example.com/), move all contents of the unzipped directory (excluding the LIME directory itself) into the root directory of your web server.
- If you want to have your LIME installation in its own subdirectory on your web site (e.g. http://example.com/whateveryouwant/), rename the LIME directory on your server into whateveryouwant
PHP server
We’re porting the server side of LIME from PHP to Node.js but it’s still work in progress so you need to setup the LIME PHP server, in order to do this is enouth to follow the steps below:
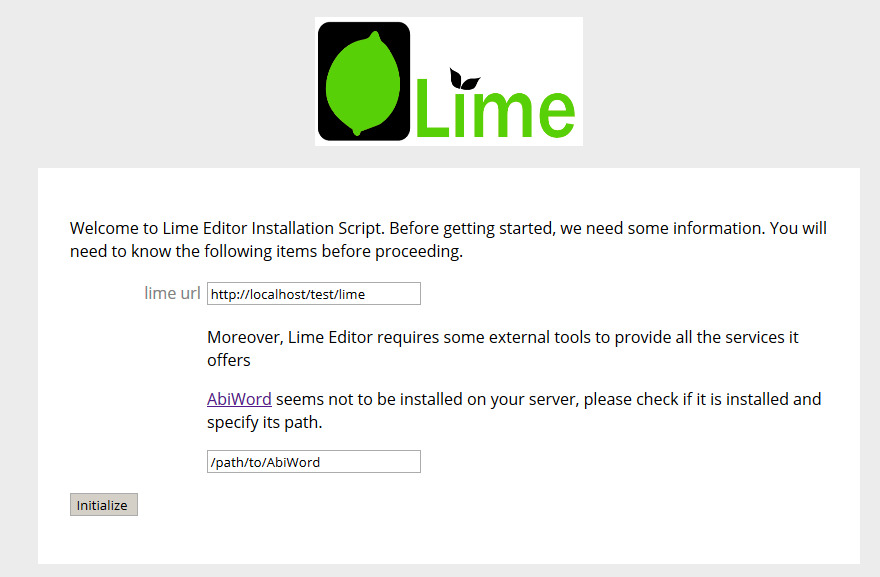
- Run the installation script by accessing the URL in a web browser. This should be the URL where you moved the files, plus the path to the installation script. e.g. http://example.com/whateveryouwant/php/setup/
- Fill the form with the requested data…
LIME client
At this point you need to configure the LIME client by changing the “config.json” file, you can find it in the root of the LIME directory which is inside the web server directory as you move it in the “Web server” section of this page.
- Open the “config.json” file with your favorite text editor.
- Change the “server.node” value with your Node.js server url (e.g. http://localhost:9006).
- If you moved the “php” folder from the root of LIME you need to change the “server.php” value.
…and that’s it!
Your LIME instance should now be installed.